An extraordinary number of readers have had issues cooking chicken breast, which was best expressed as follows:
I want to get into the healthy habit of preparing my lunches for the week in advance. I really like chicken breast but it never seems to keep well. If I eat it immediately after cooking it, it’s juicy and tender but by the next day it’s rubbery, dry and flavorless. What am I doing wrong?
Although I’ve previously written recipes that included Japanese-inspired grilled chicken thighs, chicken breasts pan seared in garlic and chili infused oil and healthy dry roasted and braised chicken thighs (cooked without any added oil), I haven’t much gone into the science of cooking chicken.
It’s important to first note that all food is tastiest freshly prepared rather than cooked, refrigerated and then reheated. That said, it is often still better to prepare your meals in advance for the week rather than purchasing food outside. Plus, given difficult and busy schedules, I can understand your desire to do this as well as your frustration.
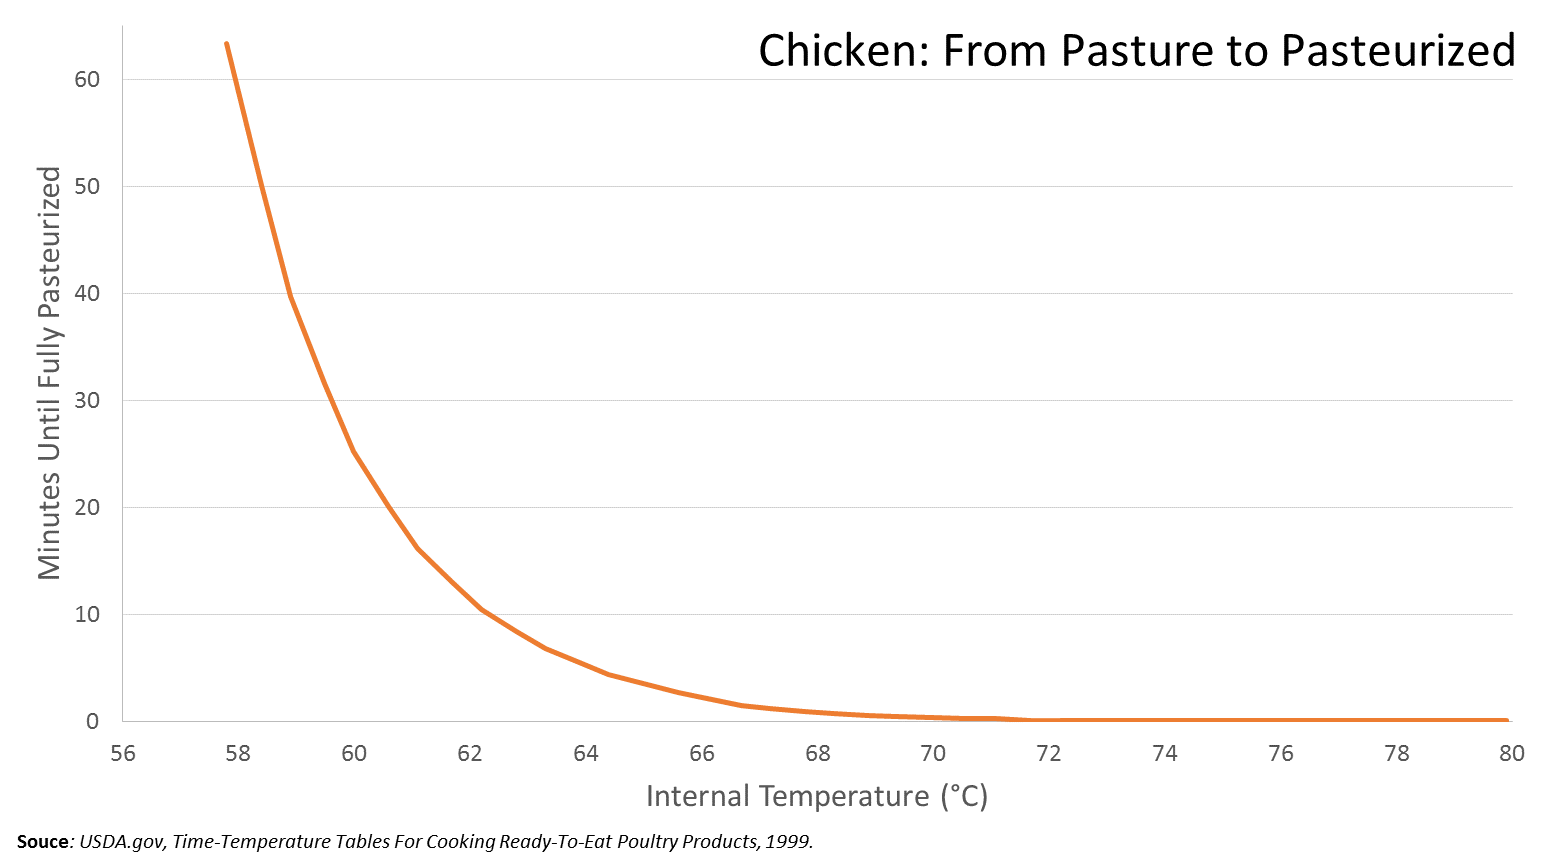
There is actually a relatively simple explanation concerning why your chicken breasts are turning out dry and it has to do with overcooking. Chicken muscle cells, like all animal muscle cells, naturally contain water, but when they reach 60 °C (140 °F) or higher, certain proteins holding up the structure of cells begin to break down. As a result, the cells basically collapse and the water squeezes out of them. You might think, then, just to cook your chicken to under 60 °C. The problem, however, is that the United States Department of Agriculture recommends that chicken be cooked to an internal temperature of 74 °C (165 °F) to kill any dangerous bacteria and make the chicken safe to eat. So what’s a guy to do?
First, it’s important to realize that the USDA’s recommendation is intended to be a one size fits all temperature to ensure literally no one with a normal immune system gets sick ever. They do this by publicizing the temperature that kills all bacteria in any poultry product in an instant (or more precisely, reduces the level of bacteria below a certain safe threshold concentration). But, as it turns out, you can kill just as much bacteria in an instant at 74 °C as you can in about 30 minutes at 60 °C. Chicken pasteurization happens on a curve and our friends at the USDA have published data which describes this curve:
So how do you achieve this? I recommend poaching. Poaching is cooking the chicken submerged in liquid below the boiling point, usually between 70 °C to 85 °C (158 °F to 185 °F). Water basically has a bunch of steam coming off the top of it at these temperatures but the bubbles of steam don’t form and rise up to the top like in boiling. If you cook chicken breast by poaching in this way for 30 minutes, then cut the heat and rest it in the water for another 20 minutes, you’ll basically be keeping the internal temperature around 60 °C for about 30 minutes (or more) total time. And it will not lose all of its cellular moisture. For additional flavor, your poaching liquid can be loaded with tasty spices, aromatic vegetables and herbs. If you boil your aromatics for about 30 minutes in water first, salt to taste, you’ve just made a vegetable stock. Then throw your chicken in and poach. After poaching, you actually have a great vegetable and chicken stock, which you can use to make a beautiful (and simple) stew.
Finally you can finish the chicken for a couple minutes on each side in the saute pan with some oil to get some color to it (which also adds complex flavor through the magic of the Maillard reaction). You can also use the oilless dry roasting technique I used elsewhere, which eliminates the empty calories from the cooking oil, but achieves a less perfect brown crust.
Many people will tell you that brining is also necessary, but it really isn’t if you’re poaching in broth for reasons that you can readily imagine. Of course, I’ve put all of this together into a single recipe, for your convenience. This is extremely simplified to make sure everyone can make it, regardless of skill level. Happy cooking!
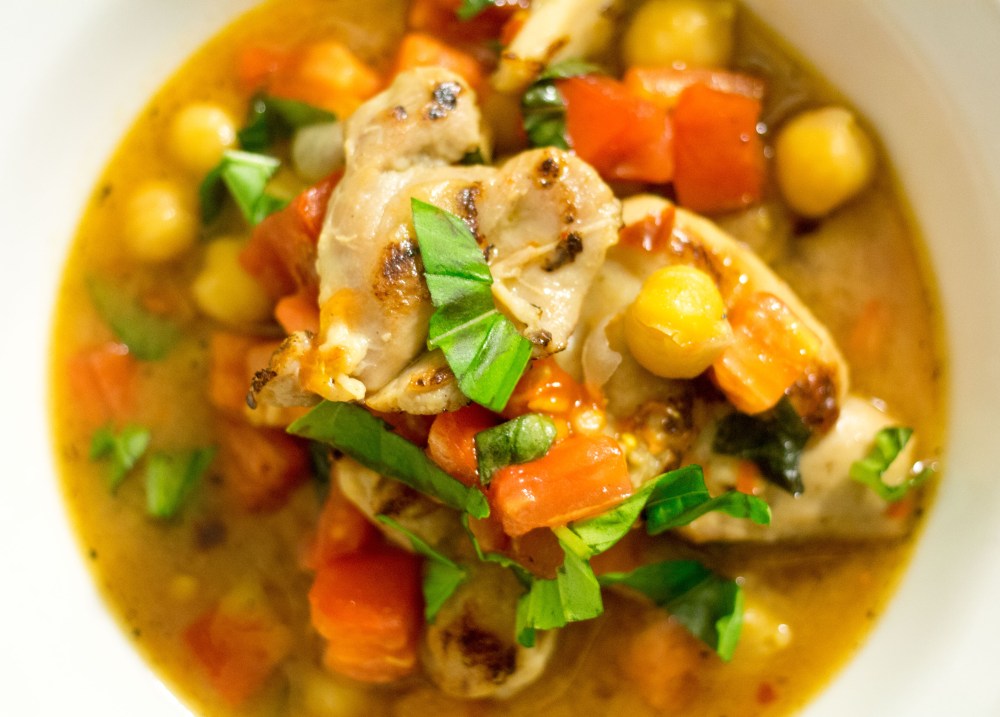
Summer Chicken Stew
Ingredients – Serves Four
400 g (14 oz or 2 count) young chicken breast, deboned and deskinned
1 L (34 oz) kombu dashi
500 g (about 1 large) Spanish onion, diced
50 g (about 6 to 8 medium cloves) garlic, finely diced
3 g (about 1.5 tbsp) dried oregano
3 g (about 1.5 tbsp) dried basil
8 g (about 1.5 tbsp) cumin seeds, finely ground
2 g (about 1 tsp) cayenne pepper, finely ground
30 g (about 1 tbsp) kosher salt, additional to taste
45 mL (about 1.5 fl oz) 80 proof vodka
425 g (15 oz) canned chickpeas, drained and rinsed
1 medium (about 60 g or 2 oz) plum varietal tomato (such as Roma), diced
6 g (about 1.5 tbsp) coriander seeds, finely ground
2 large sprigs of fresh basil, leaves only, roughly chopped
Optional
Crusty, rustic bread
Procedure
- In a large dutch oven over medium heat, add kombu dashi, onion, garlic, oregano, basil, cumin, cayenne, salt and vodka, stirring to integrate. Bring to a light simmer. Reduce heat to low and allow to lightly simmer, covered, for 30 minutes. Check simmer level every five to 10 minutes and adjust heat accordingly to maintain a light simmer.
- Uncover and add chicken breasts in a single row at the bottom of the dutch oven. Maintain heat such that broth does not simmer but merely steams heavily, within the range of 70 °C to 85 °C. No bubbles should break the surface suggesting boiling. Poach chicken for 30 minutes, uncovered. Remove from heat and continue to cook for another 20 minutes, still uncovered. Remove breasts and set aside.
- Over medium heat, bring the broth to a light simmer. Add chickpeas, tomatoes and coriander, stirring to integrate. Simmer until chickpeas are warmed through, about five minutes. Remove from heat.
- Heat a heavy, nonstick skillet over medium heat to 195 °C (383 °F). Pat dry breasts with a towel. Without any oil, sear off the breasts, turning about every 15 to 20 seconds until well browned. If meat begins to char, reduce the heat. Do not cook for more than two minute on each side. Slice each breast into four equal sized pieces.
- Apportion stew between four bowls, adding an equal amount of chicken to each bowl. Top with fresh basil and serve immediately. Chicken and stew may be combined and stored for up to one week. When ready to eat, reheat and top with basil and serve. Alternatively, the stew may be eaten separately and the chicken used as a protein for other meals, such as in salads or sandwiches.
Have a question? Ask me anything!

An useful article. The chicken stew looks delicious 🙂
Thank you!