Everyone is talking about miso these days—the Japanese salty fermented paste usually made from soybeans. Although the purported health benefits alone are headline grabbing on a weekly basis, I don’t wish to discuss or debate that here. At best, it appears medical science has a lot more to study before we can be certain of any health effects. All I know for sure is that miso is one of the most delicious things on the planet, so it may be worth checking out for those who are unfamiliar. But if you’ve ever tried to buy miso, you know how complicated it can be. There are literally thousands of different varieties of the commercially available type, many with different names, colors, textures and ingredients. The internet tends to have lots of misinformation and sorting through it can be complicated. Luckily, I’ve got you on this.
The Confusing White-Red Distinction
Although the Japanese will often tell you there are generally only two kinds of miso, shiromiso (white miso) and akamiso (red miso), these labels are often not particularly informative of the specific miso style, ingredients and taste. Very generally, shiromiso has a mild flavor, is lightly salted, definitively sweet, very smooth in texture with a light umami taste. It’s lighter colored because it has been only lightly fermented. Akamiso, despite its name, comes in colors ranging from pale yellow to red-brown to a deep burnished brown. Yes, they’re not really ever true red, just reddish-brown. That said, all varieties of akamiso are always salty and umami rich, but to varying extents. The main difference between the two, very generally, are the length of fermentation.
Towards a Definitive Guide
A more informative distinction to make among misos relate to their ingredients (although the most comprehensive distinctions are often made based on regions within Japan, much like wine, and then by ingredients, my patience to write out such a detailed account—and indeed your patience to read it—is somewhat limited). The three most important misos to consider are:
- Kome miso, generally the most common variety, is made from daizu (dried soybeans) which have been either boiled or steamed, then ground to a paste. Active culture rice koji (rice malted with aspergillus oryzae bacteria) and salt are then introduced and the mixture is fermented. If the soybeans are boiled, the resulting miso is relatively lightly fermented and retains a cream color (this is usually referred to as either shiromiso or pale miso, depending on the length of fermentation). More commonly, the soybeans are steamed and fermented for at least one year. The fermentation results in a caramel to red-brown colored akamiso. Kome miso differs considerably from region to region in Japan as a result of the use of different varieties of koji, ratios of daizu to koji, fermentation time and environmental conditions during fermentation. Although kome miso is generally consumed all over Japan, it is the most favored in the North. There are also two notable subgenres of kome miso. Genmai miso differs from standard kome miso only in that it uses whole grain rice koji, instead of refined rice koji, and is generally significantly saltier than standard kome miso. Saikyō miso, the famed and trademarked shiromiso that is the signature of Kyoto, is a very sweet varietal, often used in confectionary and in blending with other, saltier misos to attain more balanced and complex flavor. Blended miso is referred to as awasé It’s important to note that no sugar is added to Saikyō miso; its sweetness comes entirely from the intensely malted rice that is added to its daizu.
- Mugi miso, favored in southern Japan but also widely consumed in the Kanto region and as far north as Sendai, is made from daizu, barley koji (barley malted with the same aspergillus oryzae bacteria as rice koji) and salt. The color ranges from pale yellow to caramel to red-brown depending mostly on fermentation time and environmental conditions. You often find this miso in the moromi style, with the barley koji only lightly ground and quite chunky. The Japanese consider mormoni miso to be healthier than a finely ground style. The flavor and aroma of mugi miso is also highly distinctive, wine like and slightly astringent. Because of this, mugi miso is often blended with kome or genmai miso to attain more balance and complexity.
- Mame miso is the oldest type of miso and is thought to have made its way to Japan from China, via the Korean peninsula. Most famously represented by hatchō miso from Aichi Prefecture, mame miso is a deep brown, almost black color, thick as fudge and packs profound umami taste. Made entirely grain-free (so, yes, it’s friendly to our gluten-conscious friends), mame miso consists of daizu, daizu koji and salt. Mame miso is fermented for the longest duration of any miso and as a result produces quite a punch. Given its intensity, it is often used with a light hand or blended with kome miso for balance.
It’s worth noting that misos come in other, less common varietals as well, including tsuba (whole wheat), asanomi (hemp seed), sobamugi (Japanese buckwheat) and nari (cycad pulp), among many others. I’ve even seen chickpea miso in Western grocery stores made by local producers, presumably for more Western-oriented cuisines.
Armed with this knowledge, you can now start to experiment with some misos. I suggest starting with shiro and akamiso of the kome variety. Given that even misos of purportedly the same type can vary considerably by brand, experimentation is really your only friend in wading through the selections. Luckily (or unluckily), in the United States, our miso selection is often limited to about a dozen varieties at Japanese grocers. To get you started, though, below you’ll find three simple recipes, which taken together form a traditional Japanese meal. My suggestion is to start with these and, as you become more comfortable with working with miso, you can begin to improvise and expand your miso taste toolkit (that is, your experience honed sense of how to use miso to make balanced, delicious dishes). Are you excited? Because you should be! Happy eating!
Have a question? Ask me anything!
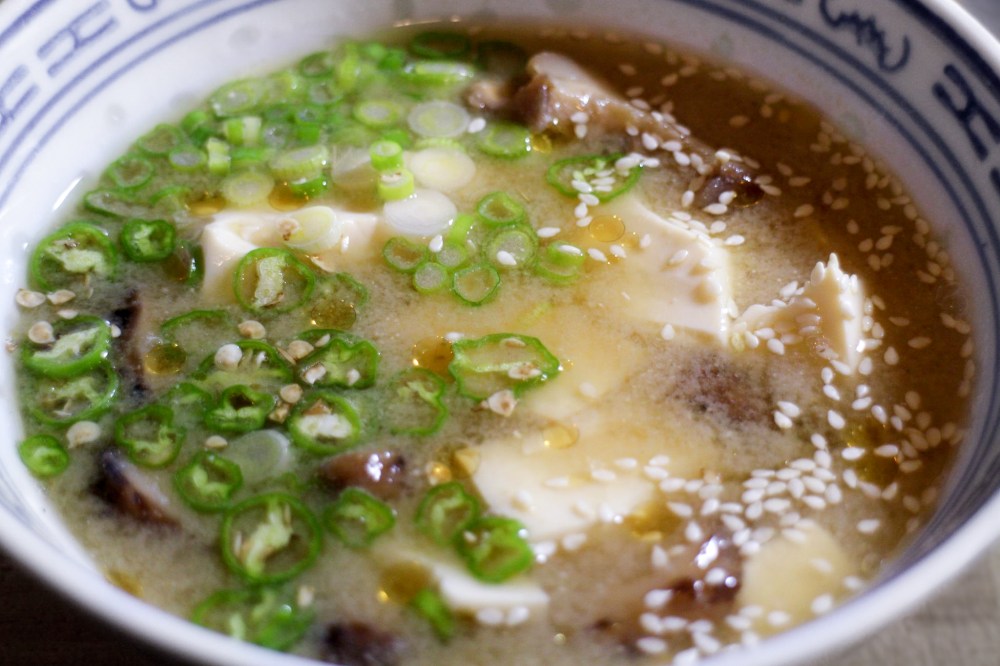
Misoshiru (Miso Soup)
Ingredients – Four Servings
25 g (0.9 oz or sheets with a surface area of about 400 cm2 or 20 by 20 cm) kombu
750 mL (750 g or about 25 fl oz) filtered water
One-quarter standard package (100 g or about 3.5 oz) momen-dōfu (firm tofu), without liquid and cut into 1 cm (0.5 in) cubes
1 – 2 (30 g or about 1 oz) medium fresh shiitake mushrooms
4 g (about 1 tbsp) dried, sliced wakame, soaked in cool filtered water for about 10 minutes
50 g (about 1.75 oz or two tbsp) smooth kome akamiso
20 g (about 0.7 oz or 1 tbsp) kome shiromiso
5g (about 1 tsp) sake
1 medium green onion, whites and greens finely sliced into thin rings
1 small serrano pepper, sliced into thin rings
4 g (about 1 tsp) sesame oil
2 g (about 1 tsp) white sesame seeds
Optional
20 g (about 0.75 cup, loosely packed) katsuobushi flakes
Preparation
- For simplified kombu dashi preparation, check out my Quick Guide to Dashi. Cut 0.5 centimeter (0.2 in) slits three centimeters (1.2 inches) apart along edges of the kombu. Combine kombu and water in an airtight container and refrigerate for at least four hours (but no greater than 24 hours) before cook time.
- Remove any soil or grit from the fresh shiitakes, but do not wash them. Remove their stems, setting aside, and cut each cap into eights, making pie-shaped wedges.
- Following the kombu’s cold soak, place the kombu in a large saucepan along with the soaking water. At medium heat, raise the temperature of the water to 75 °C (167 °F). Be careful to avoid bringing water to a boil. After raising to temperature, about five minutes, steep for 20 minutes. Remove kombu. The dashi should taste only mildly of seaweed and evoke the ocean, but with very strong umami.
- Add katsuobushi flakes, if desired, and continue to steep at 75 °C until flakes sink to the bottom of the pan, about 5 minutes. After flakes sink, strain through a fine mesh strainer (such as a chinois) or a sarashi cloth. Reserve dashi in a separate container. Note that katsuobushi is a fish product and is the only non-vegetarian item in this soup. Withholding it makes the dish entirely vegetarian. With the katsuobushi, the dashi should enrichen and deepen in flavor, taking on an even more substantial umami component and a mild but pleasing smoky flavor. It should not have a strong fishy component.
- Preheat oven to 180 °C (356 °F). Arrange sesame seeds in a single layer on a baking sheet. Place in the oven for five minutes and remove to toss seeds around in the pan. Place back in the oven and check every two minutes until light golden.
- Pour the dashi into a large saucepan and bring to a medium simmer. Add the sake and stir.
- Add mushroom caps and mushroom stems. Simmer until the mushrooms become aromatic about two minutes. Skim off any froth that develops atop the liquid.
- Remove the wakame from water and lightly squeeze out any excess water. Add the wakame and momen-dōfu to the soup, stirring gently to integrate. Remove the mushroom stems and remove saucepan from heat.
- Add both misos to a bowl and add enough soup from the saucepan to cover. Stir the miso until it is entirely dissolved. Pour about three quarters of the miso mixture back into the saucepan and stir until fully integrated. Taste the soup to ensure that is not too salty for your taste. Note that miso soup should have a pleasing saltiness, but not so much that it overwhelms the delicate flavors of the dashi and vegetables. Misos vary in salt content across styles and brands, so always be careful when adding a miso with which you’re unfamiliar. Assuming the soup is still under salted, pour the remainder of the miso mixture in, stirring until fully integrated, and taste the soup one last time. Add kosher salt, if needed.
- Ladle into four bowls and top with green onion, serrano pepper, sesame seeds and sesame oil. Serve immediately.
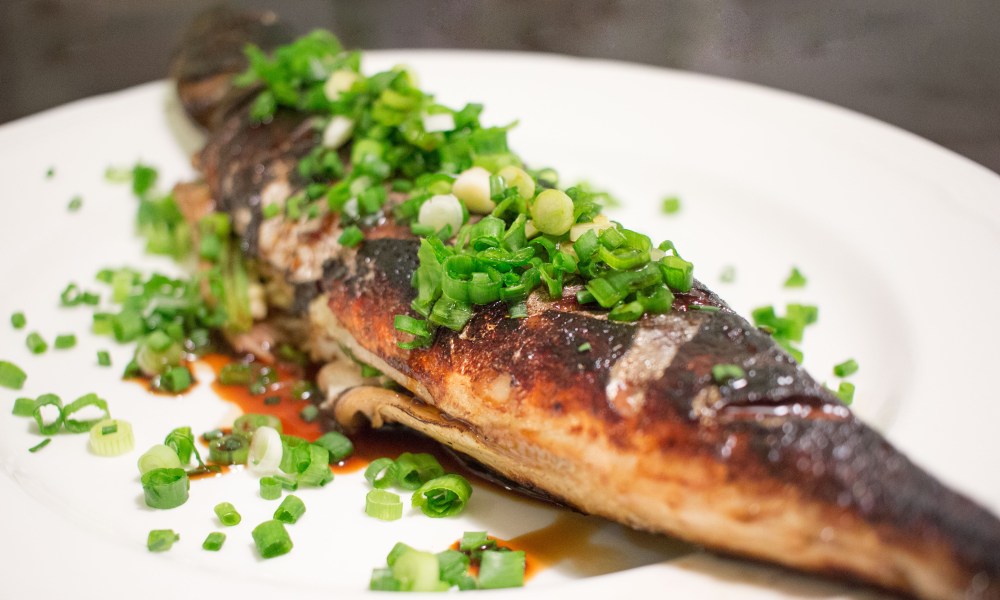
Miso Zuke Yaki (Miso Marinade for Fatty Fish)
Although this marinade is usually made with a higher content of miso and longer marinade times, I find that the following version penetrates more quickly and is more cost effective than a traditional miso zuke yaki, given the comparatively lower quantity of miso involved. Also, the Japanese traditionally do not flat top grill a fish in this manner. They either skewer the fish and grill over coals or broil the fish. This is sort of a hybrid of the two and is a simpler method of achieving similar, equally delicious results.
Ingredients – For Four Servings of Fish
10 g (about 0.3 oz or sheets with a surface area of about 160 cm2 or 20 by 8 cm) kombu
200 mL (about 7 fl oz) filtered water
250 g (about 8.5 fl oz) sake
35 g (about 1 fl oz) mirin
40 g (about 1 fl oz) light soy sauce
40 g (about 1.5 oz) kome shiromiso
10 g (a piece approximately 2 cm in across and 1 cm deep) fresh ginger, peeled and thinly sliced
15 g (about 2 to 3 cloves) garlic, finely diced
4 servings of a fatty fish such as mackerel, salmon, herring, lake trout, sardines, etc. (preferably a whole fish with bones, cleaned and descaled)
2 medium green onions, whites and greens finely sliced into thin rings
5 g (about 1 tsp) high quality light soy sauce
- Cut 0.5 centimeter (0.2 inch) slits three centimeters (1.2 inches) apart along edges of the kombu. Combine kombu and water in an airtight container and refrigerate for at least four hours (but no greater than 24 hours) before cook time, depending on the thickness of the fish.
- Following the kombu’s cold soak, place the kombu in a large saucepan along with the soaking water. At medium heat, raise the temperature of the water to 75 °C (167 °F). Be careful to avoid bringing water to a boil. After raising to temperature, about five minutes, steep for 20 minutes. Remove kombu. The dashi should taste only mildly of seaweed and evoke the ocean, but with very strong umami.
- Add the shiromiso to a bowl and add enough dashi to cover. Stir the miso until it is entirely dissolved. Pour the miso mixture into the dashi and stir until fully integrated.
- Add the sake, mirin and soy sauce, stirring to integrate.
- With a very sharp, unserrated knife, score the skin of the fish approximately every three inches on a diagonal relative to the longest edge, cutting only just below the skin and fat of the fish. This will allow for better absorption of the marinade and better crisping of the skin during grilling.
- Pour boiling water into a glass container that can hold the fish and marinade to sterilize. After about one minute, discard the water. Place the fish in the container and pour the marinade on top to fully cover the fish. It’s important that the container be small enough so that the fish is covered by the marinade but no so small that the fish does not comfortably fit while lying flat. Cover with an airtight lid or plastic wrap.
- Refrigerate for no less than four hours but no greater than 12 hours.
- When marination time is complete, remove fish and thoroughly pat dry. Stuff the abdominal cavity with with garlic and ginger.
- Note that cooking times and techniques differ based on the type of fish, its size and the manner in which it is prepared. The following are very general instructions for fatty fish. Preheat oven to 180 °C (356 °F). Heat a flat top grill or cast iron skillet to 275 °C (527 °F). You should be able to hold your hand for no longer than five seconds at about 10 cm (4 inches) from the grill at this temperature. Grill fish skin down (if filet) until skin is golden brown and turn. If whole fish, do the same on the other side. If filet, grill for about half the time and flip. Check internal temperature with an instant read, probe thermometer inserted into the thickest part of the fish. The temperature should not exceed 55 °C (131 °F). If temperature has already reached or exceeded 55 °C, remove and skip ahead to the next step. If not, continue to grill on skin side down until deep brown, flip again and grill for about half the time with skin up. Check temperature again. If skin has attained a deep brown color and the internal temperature has not reached 55 °C, place on greased baking sheet and bake until 55 °C.
- Drizzle with high quality light soy sauce and top with green onion. Serve immediately.
Shiro Neri Miso (White Miso Sauce/Salad Dressing)
Ingredients – For Four Lightly Dressed Side Salads
20 g (about 0.7 oz or 1 tbsp) kome shiromiso
15 g (about 0.5 oz or 1 tbsp) rice vinegar
10 g (a piece approximately 2 cm in diameter and 1 cm thick) fresh ginger, finely minced
30 g (about 1 fl oz) neutral oil such as soybean oil or avocado oil
10 g (about 2 tsp) Japanese fish sauce
15 g (about 2 tsp) mirin
4 side salad-sized servings of a mixture of vegetables such as arugula, endive and cucumber
- Mix rice vinegar, fish sauce and mirin in a bowl. Add shiromiso and dissolve. Add oil and ginger, beat with a small whisk or fork to emulsify. Taste to ensure a balance of acid (vinegar), sweetness (mirin) and saltiness (shiromiso and fish sauce). Add small amounts of respective ingredients until flavor is well-balanced to your taste.
- Drizzle over salad and toss well to coat.

Love adding miso to soup, thanks for all the info!
My pleasure, Tiffany. I’m glad you enjoyed the article!